
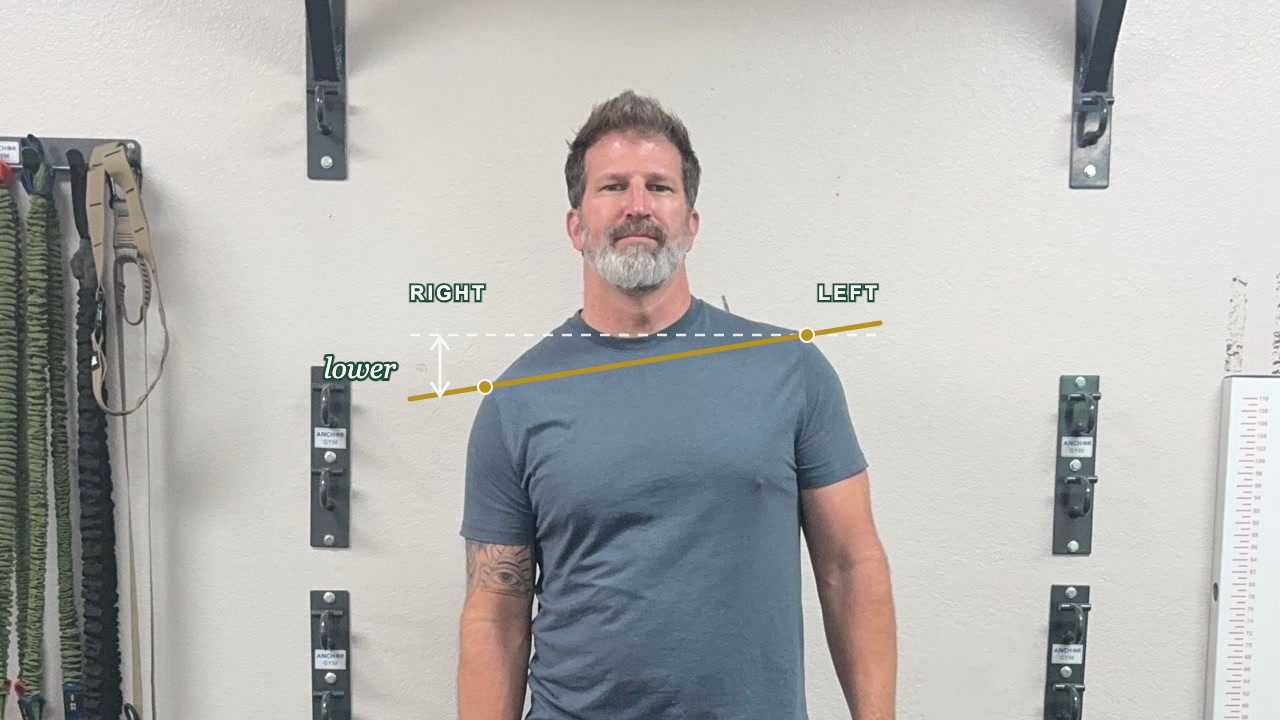
Look in the mirror. If your right shoulder sits lower than your left, you are not alone. It is one of the most common things we see in the clinic.
Pain is not always part of it. Often it shows up as a shoulder that feels tight when you reach overhead, a shoulder that rolls forward, or a strap that keeps slipping off one side.
Why it happens
A shoulder does not sit where it sits by accident. The muscles on the front of the shoulder and chest can pull it forward and down. If those muscles stay tight, and the muscles that lift your arm overhead are not doing their share, the shoulder settles into that position.
The mid back plays a part too. If one side of your mid back has not opened up, your shoulder has less room to move into.
Think of a tent. If the ropes on one side are tighter than the other, the pole leans. Loosening the tight ropes helps. Keeping the pole up takes strength.
That is the plan, in order.
How to set up
For all four drills:
- Left foot back, right foot forward, with your left toes in line with your right heel.
- Ribs stacked over your pelvis.
For the Pec Stretch, the Mid Back Stretch and the Banded Shoulder Flexion, add the turn:
- Push through the outside of your right foot and pull through the inside of your left foot to turn your pelvis and ribs to the left.
Move slowly. You should feel muscle, not a pinch.
The four drills
1. Release: Front Arm Smash
Use a small ball against a wall to loosen the muscle on the front of your shoulder and upper arm. Tight tissue here is often the first thing in the way of reaching overhead. Stay on muscle, off the collarbone and out of the armpit.
Dose: 1 to 2 minutes, right side
2. Stretch: Pec Stretch
Once the front is looser, lengthen the chest muscle that pulls the shoulder forward. Rest your other hand on your chest so you can feel it working.
Dose: 30 seconds, right side
3. Open the mid back: Mid Back Stretch
This one creates space on the left side of your mid back so it has room to open up when you turn and reach.
Dose: 30 seconds, left side
4. Strengthen: Banded Shoulder Flexion
This is the step that makes it last. A stretch gives you range. Lifting your arm overhead with control teaches your body to use that range.
Dose: 2 to 3 sets of 8 to 10, right side
How often
Do them in this order, a few times a week.
When to stop and call us
Stop and get checked if you have sharp pain, tingling or numbness down the arm, pain at night, or a shoulder that has not been right since an injury. Those need a closer look before any exercise plan.
If it does not change
These four moves are a starting point. If your shoulder still sits low or feels stuck after a few weeks, the reason may be somewhere else, such as your rib cage or upper back. That is what a movement assessment finds.
This is general education, not a substitute for an exam.
Want us to look at how your shoulders and rib cage move? Book your initial evaluation at Taylor Made Integrative Therapy in Fort Worth, TX. Start treatment on your first visit.
Book Your Evaluation →Prefer to talk first? Call or text (817) 523-9590 or email info [at] tmitherapy.com.

Dr. Taylor is a TPI-certified sports chiropractor at Taylor Made Integrative Therapy in Fort Worth, TX. He helps golfers, athletes, and active adults move better, feel better, and perform at their best — by fixing the movement issues underneath the pain. More about Dr. Taylor →